 If you’re an avid fisherman, you know that a transducer is an essential component of your fishing setup. It enables you to locate fish and measure water depth accurately, ensuring better fishing results. However, simply having a transducer is not enough. You need to properly install it by running the transducer cable on your trolling motor to achieve optimal performance.
In this section, we will guide you through the process of running a transducer cable on your trolling motor in a step-by-step manner. We’ll cover everything you need to know, including the necessary tools and materials, preparing the transducer cable, and mounting the transducer. By the end of this guide, you’ll be equipped with the skills to run a transducer cable on your trolling motor like a pro.
Gather the Necessary Tools and Materials
Before you start running the transducer cable on your trolling motor, it’s essential to have all the tools and materials required for the job.
Tools and materials
Here’s a list of tools and materials you’ll need:
- A transducer cable kit.
- Wire strippers.
- Electrical tape.
- Zip ties.
- A screwdriver.
You can purchase a transducer cable kit that includes all the necessary components for running the cable on your trolling motor. Alternatively, you can source the components individually. Make sure you have all the necessary tools and materials before you begin to avoid any interruptions during the installation process.
Now that you have everything you need, it’s time to move on to the next step: preparing the transducer cable for installation.
Prepare the Transducer Cable
Before you can install the transducer cable, you need to prepare it properly. Follow these steps to ensure that your cable is in good condition and ready for installation:
- First, inspect the transducer cable for any damage. Look for frayed wires, cracks in the insulation, or other signs of wear and tear. If you find any damage, you’ll need to replace the cable before proceeding with the installation.
- If the cable is in good condition, you can move on to removing any existing connectors from the wires. Use wire strippers to remove the insulation from the ends of the wires.
- Next, twist the wires together to prepare them for connecting to the transducer. Make sure that the connections are secure and tight.
- Finally, wrap the twisted wires with electrical tape to insulate them and prevent any shorts. Make sure to use enough tape to cover the entire connection and provide a secure hold.
By following these steps to prepare your transducer cable, you can ensure that it is in perfect condition for installation. Once you have prepared the cable, you can move on to mounting the transducer and running the cable along the trolling motor shaft.
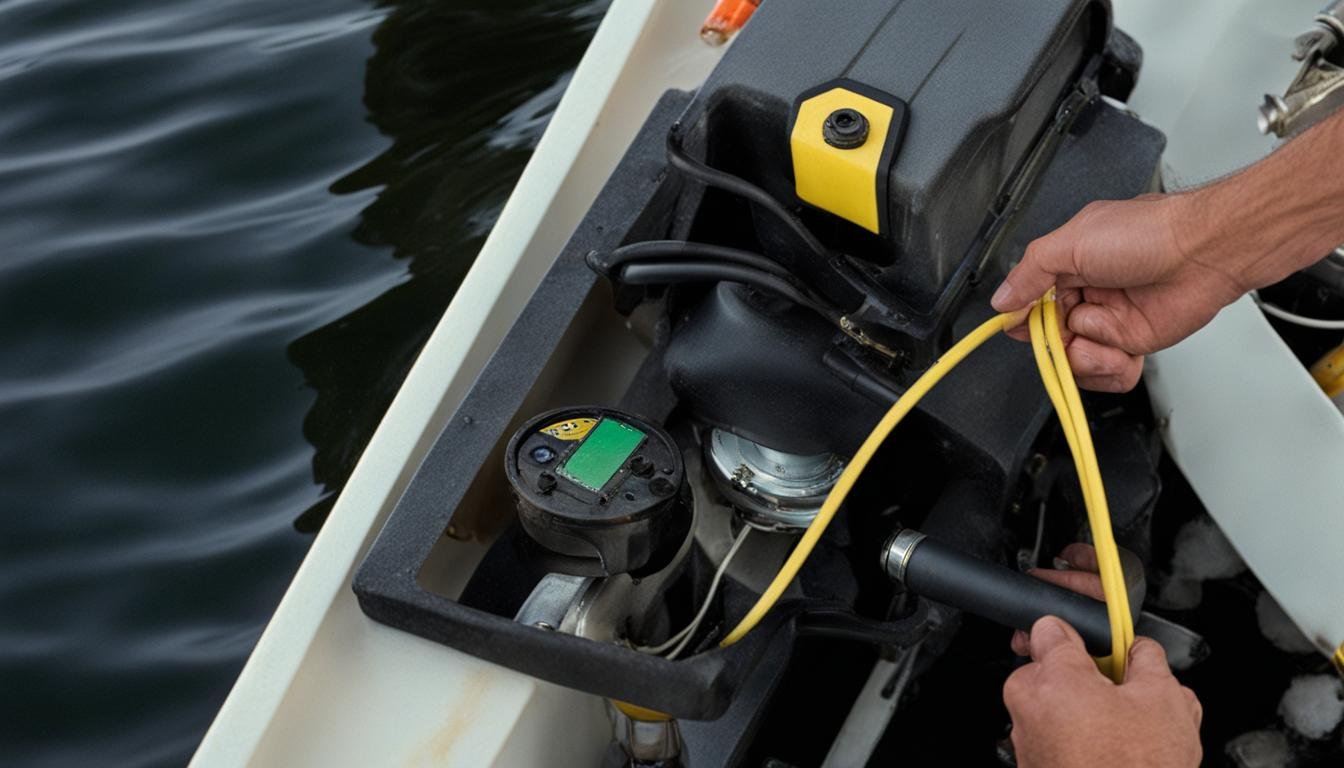
Mount the Transducer and Run the Cable
Now that the transducer cable is prepared, it’s time to mount the transducer and run the cable along the motor shaft.
Start by attaching the transducer to the mounting bracket using the screws provided in the transducer kit. Be sure to follow manufacturer instructions for proper placement and orientation of the transducer.
Next, locate a suitable path for the cable along the motor shaft. It’s important to keep the cable away from moving parts and sharp edges to prevent damage. You can use zip ties to secure the cable to the motor shaft at regular intervals.
Using the electrical tape, secure the cable to the motor body, ensuring that the tape is tight and secure. This will prevent the cable from moving or bouncing around while the trolling motor is in use.
Once the cable is secured, use more zip ties to attach it to the transducer mounting bracket. This will prevent the cable from dragging or getting caught on anything while you are trolling.
Finally, connect the transducer cable to the sonar unit according to manufacturer instructions. Test the unit to ensure it’s working properly before heading out on your next fishing trip.
Conclusion
In conclusion, running a transducer cable on your trolling motor can greatly enhance your fishing experience by improving accuracy and precision. By following the step-by-step guide we have provided, you can successfully install the transducer cable and begin enjoying the benefits of improved performance.
Take Your Time
It’s important to take your time during the installation process to ensure all connections are secure and the cable is properly mounted. Rushing through the process can result in a less than optimal performance.
Enjoy the Results
Once you have successfully installed the transducer cable on your trolling motor, it’s time to enjoy the improved performance and precision. Whether you’re a seasoned angler or a beginner, this simple upgrade can make a significant impact on your fishing experience.
Final Thoughts
We hope this guide has been helpful in guiding you through the process of running a transducer cable on your trolling motor. If you have any further questions or concerns, feel free to consult the instruction manual or seek assistance from a professional.

- How to Inflate Intex Explorer K2 Kayak? - June 10, 2025
- Experience the Thrill of Tandem Kayaking with Necky Amaruk Tandem Kayaks - April 13, 2024
- How to Transport a Kayak on a Car? - February 29, 2024