 Enhancing your boating skills is essential to enjoying the waterways, and one of the best ways to do that is to install a bow mount trolling motor on your boat. If you’re a boating enthusiast and looking to install a bow mount trolling motor, you are in the right place. In this section, we will provide a comprehensive step-by-step guide with professional guidance on how to install a bow mount trolling motor.
Our expert guidance will help you learn the essential steps, from choosing the right trolling motor to mounting it on your boat. With our detailed guide, you’ll be able to install a bow mount trolling motor successfully, even if you have little experience with boating or DIY projects.
So, let’s begin this exciting journey to enhance your boating skills with our step-by-step guide on how to install a bow mount trolling motor.
Choosing the Right Bow Mount Trolling Motor
Before you start the installation process, choosing the right bow mount trolling motor is crucial to ensure your boating experience is optimal. Here are some factors to consider when selecting the right trolling motor:
- Battery Power: The trolling motor’s battery power should match your boat’s size and weight. A motor with too little power will cause poor performance and likely burn out quickly. On the other hand, an oversized motor will consume more battery power than necessary and will add unnecessary weight to the boat.
- Thrust: Thrust is the force that propels your boat forward, and it should match your boat’s size and weight. When deciding how much thrust you need, a general rule of thumb is to have two pounds of thrust for every 100 pounds of weight.
- Shaft Length: The shaft length should be appropriate for your boat’s height and transom depth, as well as the water conditions in which you will be boating. If the shaft is too short, the motor will not be submerged enough to provide sufficient thrust. If the shaft is too long, it can make steering difficult and even cause damage to the motor.
- Saltwater or Freshwater: Trolling motors for saltwater and freshwater are different, and it is important to select the appropriate one for your boating environment. Saltwater motors feature additional corrosion protection to withstand the harsh environment, while freshwater motors generally do not require such protection and are less expensive.
By taking these factors into consideration, you can choose the right bow mount trolling motor that matches your boating needs and enhances your overall boating experience.
Gathering the Necessary Tools and Equipment
Before beginning the installation process, it’s essential to gather all the necessary tools and equipment to ensure a smooth and efficient installation. Here is a list of necessary tools and equipment you will need:
| Tools | Equipment |
|---|---|
| Drill | Bow mount trolling motor |
| Wire cutters/strippers | Mounting brackets |
| Adjustable wrench | Stainless steel bolts |
| Screwdrivers | Locking nuts |
| Socket wrench set | Marine sealant |
| Pliers | Zip ties |
Having all the necessary tools and equipment will make the installation process much easier and efficient. Make sure you have everything on this list before starting the installation process.
The installation process will require some boating skills, but even if you are a beginner in boat installations, our step-by-step guide and professional guidance will help you successfully install a bow mount trolling motor on your boat.
Preparing the Boat for Installation
Before installing the bow mount trolling motor, it is crucial to prepare your boat appropriately. Failure to do so may result in a faulty installation and damage to your boat. Follow these steps to ensure a smooth and successful installation:
Check the Boat’s Structural Integrity
Before you begin installing the trolling motor, inspect the boat’s hull to ensure that it can support the weight of the motor. Check for any cracks or damage that could compromise the structural integrity of the hull.
Remove Any Obstacles
Remove any obstacles from the bow area of the boat, such as fishing rod holders or lights, to make sure you have ample space to install the trolling motor. Also, make sure that the area you are working in is well-lit and ventilated.
Prepare the Mounting Surface
If the mounting surface is not clean and smooth, the trolling motor’s mounting bracket may not fit properly, resulting in an unstable connection. Use sandpaper or a wire brush to remove any dirt or debris from the mounting surface.
Secure the Bow Plate
Once the surface is clean, it is time to secure the bow plate, which serves as the base for the trolling motor’s mounting bracket. The bow plate should align properly with the mounting surface and be secured firmly in place using stainless steel screws.
Attach the Mounting Bracket
Once the bow plate is attached, the mounting bracket can be installed. The mounting bracket should be attached to the bow plate using stainless steel screws, ensuring a secure and stable connection.
By following these steps to prepare your boat for installation, you can ensure that your bow mount trolling motor will be installed correctly and function properly. Next, we will move on to the crucial step of mounting the trolling motor.
Mounting the Bow Mount Trolling Motor
Mounting the bow mount trolling motor is a crucial step that requires careful attention to ensure optimal performance. Here are the steps involved:
- Position the mounting bracket on the bow of the boat. Make sure it is centered and aligned with the keel.
- Use a pencil to mark the location of the mounting holes on the bow.
- Drill pilot holes through the marked spots.
- Place the mounting bracket back on the bow and align the holes in the bracket with the pilot holes.
- Insert the bolts through the holes and tighten the nuts with a wrench. Make sure the bracket is firmly secured.
- Attach the trolling motor onto the mounting bracket. Adjust the angle of the motor to align it with the boat’s waterline.
- Secure the trolling motor to the mounting bracket with locking bolts or clamps.
Wiring the Bow Mount Trolling Motor
Once the bow mount trolling motor is securely mounted, the next step is to wire it properly. The wiring process can be complex, but with our step-by-step guide, you can complete it easily.
Here is a list of the tools and equipment you will need:
- Wire cutters/strippers
- Electrical tape
- Crimp connectors
- Butt connectors
- Heat shrink tubing
- Wire connectors
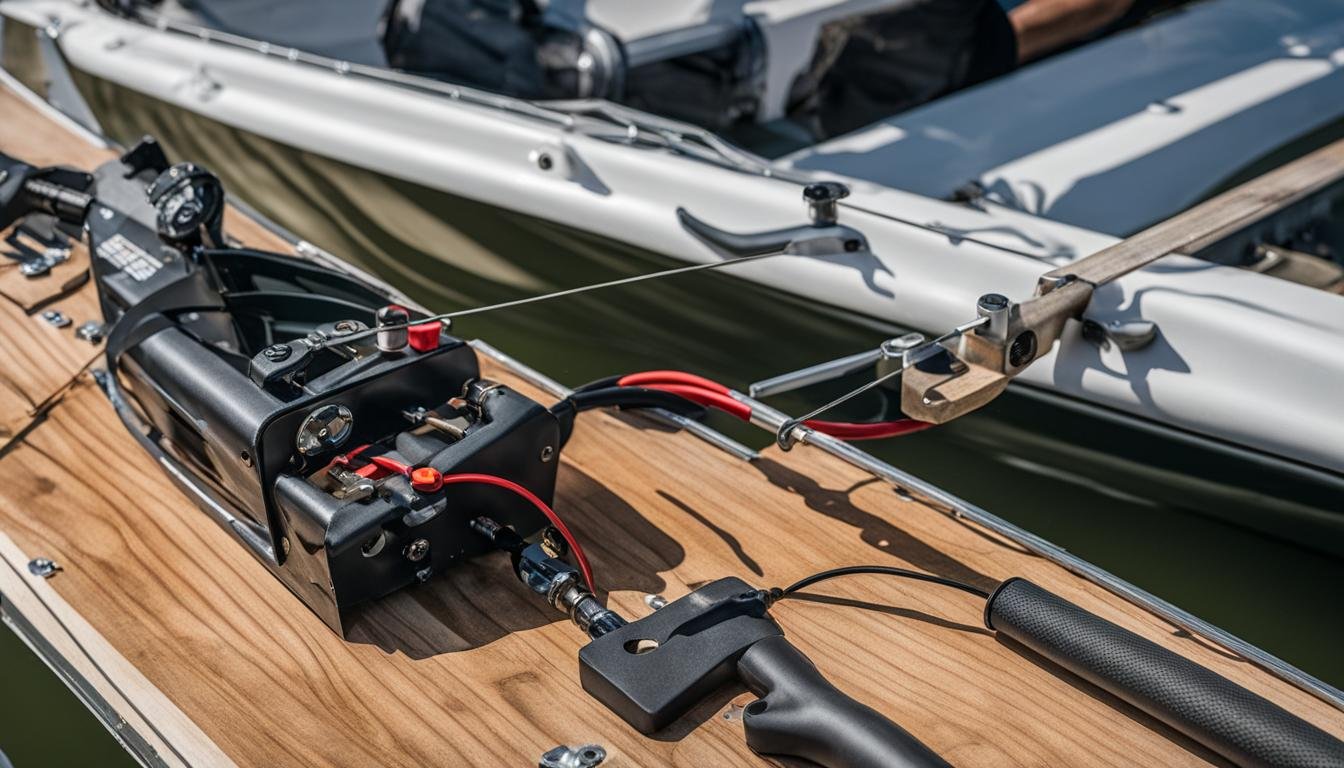
Start by connecting the battery cables to the trolling motor. Connect the red cable to the positive terminal and the black cable to the negative terminal. Use crimp connectors to attach the cables to the battery terminals.
Next, install a circuit breaker between the battery terminals and the trolling motor. This circuit breaker acts as a switch and protects the motor from electrical overload or short circuits. You can use a manual reset breaker or an automatic reset breaker, depending on your preference.
Use electrical tape to wrap the connections and secure them in place. You can also use heat shrink tubing to provide extra protection and prevent any possible leakage of electricity.
Now, connect the wiring from the trolling motor to the control panel and foot pedal. Follow the manufacturer’s instructions for the correct color-coding and attach the wires using wire connectors.
Finally, test the trolling motor to ensure that everything is functioning properly. Turn on the circuit breaker and check that the motor runs smoothly. You can also test the motor in the water to see how it performs under different conditions.
By following these steps, you can successfully wire your bow mount trolling motor and enjoy a smooth and efficient boating experience.
Testing and Calibration
After the installation process and wiring are complete, it is crucial to conduct thorough testing and calibration of your bow mount trolling motor. This will ensure that it functions optimally and provides you with improved maneuverability and control on the water.
First, conduct a static balance test to check the motor’s alignment and balance before launching your boat. Place your boat on a level surface and check the alignment of the motor to ensure it is straight and not crooked. This will help prevent excessive wear and tear on the motor, battery, and other components during operation.
Next, conduct a water test to check the motor’s performance in different conditions. It is recommended to test the motor in calm and rough water conditions to ensure that it performs consistently and efficiently. Use a GPS or speedometer to check the motor’s speed and ensure that it is functioning at the desired level.
Finally, calibrate the motor’s settings to suit your boating needs. This involves adjusting the motor’s speed and directional controls to your preferences and perfecting your steering skills. Take your boat out for a few test runs and make any necessary adjustments until you feel comfortable with the motor’s performance.
Testing and Calibration Checklist
| Test/Calibration | Description |
|---|---|
| Static Balance Test | Check the motor’s alignment and balance on a level surface |
| Water Test | Test the motor’s performance in calm and rough water conditions |
| Speed Check | Use a GPS or speedometer to check the motor’s speed |
| Calibration | Adjust the motor’s speed and directional controls to suit your preferences and perfect steering skills |
Conclusion
Installing a bow mount trolling motor may seem daunting at first, but with our step-by-step guide and professional guidance, you can easily enhance your boating experience. By choosing the right trolling motor, gathering the necessary tools, preparing your boat, and mounting and wiring the motor correctly, you can improve your boat’s maneuverability and control on the water.
Stay Safe and Have Fun!
Remember to always prioritize safety when installing and using your bow mount trolling motor. Double-check all connections and consult with a professional if you have any doubts or questions. With the right equipment and boating skills, you can enjoy exploring the waterways with improved comfort and reliability.
Thank you for choosing our guide to install your bow mount trolling motor. Happy boating!

- How to Inflate Intex Explorer K2 Kayak? - June 10, 2025
- Experience the Thrill of Tandem Kayaking with Necky Amaruk Tandem Kayaks - April 13, 2024
- How to Transport a Kayak on a Car? - February 29, 2024