 Inflating the Intex Challenger K2 Kayak is a straightforward process that allows you to get on the water quickly and easily. This popular inflatable kayak is designed for two adults and offers stability and comfort during your paddling adventures.
To inflate the Challenger K2 Kayak, follow the step-by-step instructions provided in the owner’s manual. Make sure to use the included high-output pump, which is specifically designed for inflating the kayak efficiently. By inflating the air chambers to the recommended working pressure, you ensure optimal performance on the water.
Before launching the kayak, it is essential to secure the seats and other accessories to ensure they are properly attached. This will make your paddling experience safer and more enjoyable.
Remember, proper inflation is crucial for the performance and stability of your Challenger K2 Kayak. By following the correct inflation procedure, you can embark on your paddling adventures with peace of mind, knowing that your kayak is ready for the water.
Introduction to the Intex Challenger K2 Kayak
The Intex Challenger K2 Kayak is a sporty and fun inflatable kayak that offers a thrilling experience on the water. With its streamlined design and rugged vinyl construction, this kayak is built for adventure. It features an inflatable I-beam floor that provides both comfort and rigidity, allowing for a stable and enjoyable ride.
The Challenger K2 Kayak is equipped with high-buoyancy side chambers and a low-profile deck, ensuring stability and balance even in choppy waters. The adjustable inflatable seats offer customizable comfort for extended trips, while the cargo net provides a handy storage solution for your gear. Additionally, the removable skeg enhances directional stability, making it easier to maneuver the kayak with precision.
Designed to be lightweight and compact, the Challenger K2 Kayak is easy to assemble and inflate. The included pump ensures quick and hassle-free inflation, allowing you to get on the water in no time. Whether you’re a beginner or an experienced paddler, this kayak offers a thrilling and convenient way to explore lakes, slow rivers, and calm coastal waters.
| Key Features | Benefits |
|---|---|
| Streamlined design | Enhanced speed and maneuverability |
| Rugged vinyl construction | Durable and long-lasting |
| Inflatable I-beam floor | Comfort and rigidity |
| High-buoyancy side chambers | Stability in rough waters |
| Adjustable inflatable seats | Customizable comfort |
| Removable skeg | Improved directional stability |
Inflating the Challenger K2 Kayak
To fully enjoy your Intex Challenger K2 Kayak, it’s important to know how to properly inflate it. Follow these step-by-step instructions to ensure a smooth and successful inflation process:
- Start by unpacking the kayak and laying it out on a flat surface. This will make it easier to access the valves and pump.
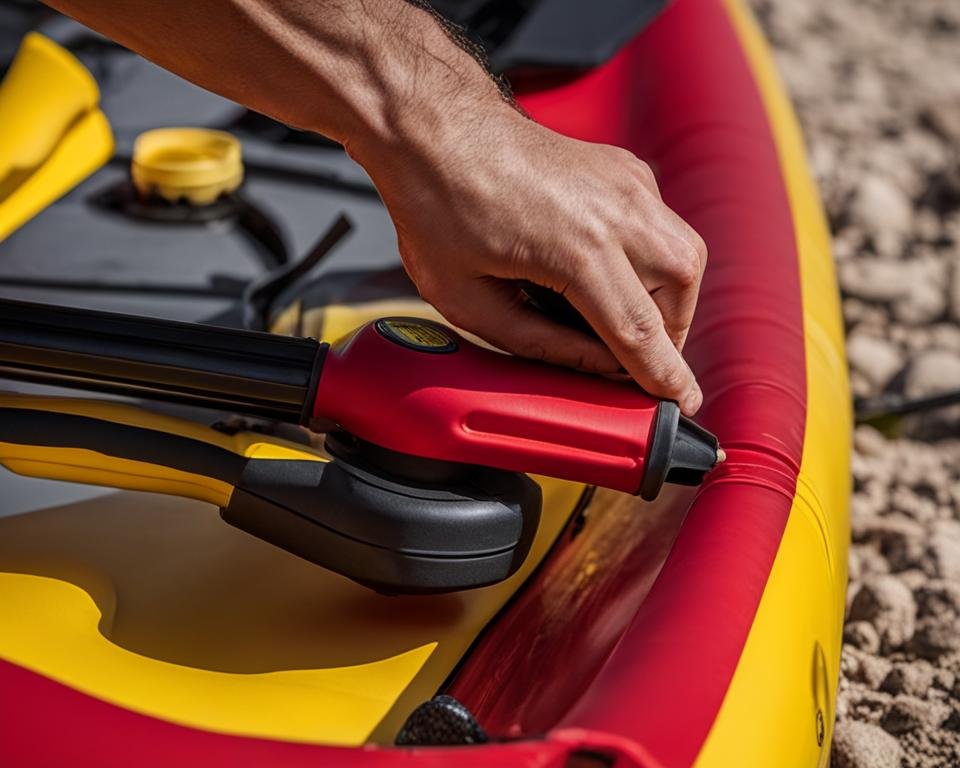
- Attach the high-output pump to the Boston valves on the air chambers. The Boston valves are designed to prevent air leakage and allow for quick and easy inflation.
- Begin pumping air into the kayak by using the pump’s handle. Make sure to inflate the chambers in the numbered sequence provided in the owner’s manual. This will help maintain the kayak’s stability and performance on the water.
- Continue pumping until the kayak reaches the recommended working pressure. It is important not to overinflate the kayak, as this can cause damage to the chambers.
- Once the kayak is fully inflated, secure the Boston valves to prevent air leakage. This can be done by twisting the valve clockwise until it is tight.
- After inflating the kayak, attach the seats and other accessories according to the instructions provided. This will ensure a comfortable and enjoyable paddling experience.
By following these steps, you’ll be able to inflate your Challenger K2 Kayak with ease and get out on the water in no time.
Troubleshooting Tip: Dealing with Air Leaks
If you notice any air leaks in your kayak during the inflation process, there are a few troubleshooting steps you can take:
- Check the valves to make sure they are properly sealed. Sometimes, a loose valve can cause air leakage. If necessary, tighten the valves to ensure a secure seal.
- Inspect the kayak for any punctures or holes. If you find a puncture, use the included repair patch kit to seal it. Follow the instructions in the kit carefully for the best results.
- If the air leak persists, contact the manufacturer’s customer service for further assistance. They will be able to provide guidance on troubleshooting and possible solutions.
Inflating the Challenger K2 Kayak is an essential step to getting out on the water and enjoying your paddling adventures. By following the correct inflation process and addressing any issues that may arise, you’ll be able to make the most of your inflatable kayak for years to come.
Using the Challenger K2 Kayak
Once you have inflated the Intex Challenger K2 Kayak and it is ready to use, it’s time to embark on your paddling adventure. Before getting into the kayak, ensure that the weight is evenly distributed between you and your partner. This will help maintain stability and ensure a smooth ride on the water.
With the seats securely in place, grab the included paddles and position yourself comfortably in the adjustable inflatable seats. Make sure to hold the paddles correctly, with one hand on the top grip and the other hand on the shaft, and alternate your strokes smoothly to propel the kayak forward. The sleek design of the Challenger K2 Kayak allows for efficient and controlled movement through the water, making your paddling experience enjoyable and effortless.
The inflatable I-beam floor of the kayak provides both comfort and rigidity, allowing you to maintain your balance and stability while paddling. Additionally, the removable skeg enhances the kayak’s directional stability, helping you navigate and steer with ease.
It is important to follow safety guidelines and regulations while using the Challenger K2 Kayak. Always wear a properly fitting personal flotation device (PFD) and familiarize yourself with the local rules and regulations regarding watercraft use. Paddle in calm conditions and be mindful of any potential hazards such as obstacles or strong currents. By adhering to these safety measures, you can fully enjoy your time on the water with peace of mind.
Key Points:
- Distribute weight evenly in the kayak for stability
- Hold the paddles correctly and use smooth strokes
- The inflatable I-beam floor provides comfort and rigidity
- Use the removable skeg for enhanced directional stability
- Follow safety guidelines and regulations for watercraft use
Care and Maintenance of the Challenger K2 Kayak
Proper care and maintenance are crucial to keep your Challenger K2 Kayak in optimal condition for years of enjoyable paddling. By following a few simple steps, you can extend the lifespan of your kayak and ensure its performance on the water.
Maintenance Checklist
- Rinse with Fresh Water: After each use, thoroughly rinse the kayak with fresh water to remove any dirt, sand, or saltwater residue. This helps prevent corrosion and maintains the kayak’s appearance.
- Clean with Mild Soap: Use a mild soap and a soft brush to clean the kayak’s surfaces. Avoid using harsh chemicals or abrasive scrubbers, as they can damage the kayak’s material.
- Dry Thoroughly: Before deflating and storing the kayak, make sure it is completely dry. This prevents the growth of mold and mildew and prolongs the kayak’s lifespan.
- Store Properly: Store the kayak in a cool, dry place away from direct sunlight and extreme temperatures. Ideally, lay the kayak flat or hang it vertically to prevent deformation.
- Inspect Regularly: Routinely inspect the kayak for any signs of damage or wear, such as punctures, leaks, or loose fittings. Promptly address any issues to prevent further damage.
- Repair as Needed: If you encounter small punctures or leaks, use the included repair patch kit to fix them. Follow the instructions carefully for a secure and durable repair.
Recommended Tools and Products
Here are some recommended tools and products to assist you in caring for and maintaining your Challenger K2 Kayak:
| Tool/Product | Description |
|---|---|
| Kayak Cleaning Solution | A gentle cleaning solution designed specifically for kayaks. It effectively removes dirt and grime without harming the kayak’s material. |
| Soft Brush | A soft-bristled brush or sponge that is safe to use on the kayak’s surface. It helps to remove stubborn stains or debris. |
| Air Pump | A high-output air pump that is compatible with Boston valves. It makes inflating the kayak quick and easy. |
| Repair Patch Kit | A repair patch kit that includes patches, adhesive, and instructions for fixing small punctures or leaks. |
By following these care and maintenance guidelines and using the recommended tools and products, you can ensure that your Challenger K2 Kayak remains in excellent condition and provides countless hours of paddling enjoyment.
Troubleshooting and Repairs for the Challenger K2 Kayak
If you encounter any issues or damage with your Challenger K2 Kayak, it’s important to know how to troubleshoot and make necessary repairs. The following guide will help you address common problems and keep your kayak in top shape.
Air Leaks
One of the most common issues with inflatable kayaks is air leaks. If you notice that your Challenger K2 Kayak is losing air, the first step is to inspect all the valves and seams for any signs of damage or wear. If you locate a leak, clean and dry the area thoroughly before applying the included repair patch. Press the patch firmly onto the damaged area, making sure to cover the entire hole. Allow the patch to cure according to the instructions provided, and then inflate the kayak to check for any remaining leaks.
Punctures
If your Challenger K2 Kayak gets punctured, it’s important to repair it promptly to prevent further damage. Start by locating the puncture and marking its exact position. Clean and dry the area around the puncture, and then apply the repair patch. Press the patch firmly onto the puncture, ensuring complete coverage. Allow the patch to cure before inflating the kayak to verify that the puncture has been successfully repaired. It’s recommended to keep a few spare repair patches on hand in case of future punctures.
Valve or Accessory Issues
If you’re experiencing problems with the valves or accessories of your Challenger K2 Kayak, refer to the owner’s manual for troubleshooting guidance. The manual will provide specific instructions on how to address issues such as valve leaks or accessory malfunctions. If the problem persists or requires more complex repairs, contact the manufacturer’s customer service for assistance. They will be able to provide further guidance and support to help resolve the issue.
| Issue | Resolution |
|---|---|
| Air Leaks | Inspect and repair any damaged valves or seams using the included repair patch. |
| Punctures | Locate and mark the puncture, clean and dry the area, and apply a repair patch following the instructions provided. |
| Valve or Accessory Issues | Refer to the owner’s manual for troubleshooting tips, and contact customer service for further assistance if needed. |
By following these troubleshooting steps and making necessary repairs, you can ensure that your Challenger K2 Kayak remains in great condition for many paddling adventures to come.
Conclusion
To conclude, inflating the Intex Challenger K2 Kayak is a simple process that can be accomplished by following the provided instructions and using the included pump. This popular inflatable kayak, designed for two adults, offers stability, comfort, and durability for enjoyable paddling experiences on calm lakes and mild rivers.
Proper care and maintenance are essential to ensure the longevity and performance of the Challenger K2 Kayak. After each use, it’s important to clean the kayak with fresh water and mild soap to remove any dirt or debris. Thoroughly drying the kayak before deflating and storing it in a cool, dry place away from direct sunlight and extreme temperatures will help prevent damage.
In the event of any issues or damage, referring to the troubleshooting section of the owner’s manual can provide guidance. Small punctures or leaks can be repaired using the included patch kit. For more complex repairs or warranty concerns, it is advisable to contact the manufacturer’s customer service.
Remember, safety should always be a priority when using the Challenger K2 Kayak. Adhere to regulations and guidelines specific to your location, and enjoy your paddling adventures!

- How to Inflate Intex Explorer K2 Kayak? - June 10, 2025
- Experience the Thrill of Tandem Kayaking with Necky Amaruk Tandem Kayaks - April 13, 2024
- How to Transport a Kayak on a Car? - February 29, 2024