 Are you looking to enhance the performance of your trolling motor? Extending the wires for your trolling motor can provide you with greater maneuverability and flexibility on the water. In this comprehensive guide, we will walk you through the process of safely and efficiently extending trolling motor wires.
Whether you’re in need of a trolling motor wire extension or simply want to explore the possibilities of extending wires for your trolling motor, we’ve got you covered. From assessing your wiring needs to gathering the necessary tools and materials, we’ll help you navigate each step of the process.
So, let’s dive in and learn how to extend trolling motor wires to unlock the full potential of your boating experience.
Assessing Your Wiring Needs
Before extending your trolling motor wires, it’s crucial to assess your wiring needs to ensure a successful and safe installation. There are three key factors to consider: determining wire length, evaluating wire gauge, and determining wire connectors.
Determining Wire Length
The first step is to determine the length of wire you will need to reach your desired battery location. Measure the distance from the trolling motor to the battery, considering any routing or obstacles that may affect the path of the wires. It’s essential to have enough wire length to allow for flexibility and ease of installation. Ensure you add a few extra inches for any unexpected twists or turns.
Evaluating Wire Gauge
Next, evaluate the wire gauge of your existing trolling motor wires. The gauge refers to the thickness of the wire, with a lower gauge indicating a thicker wire. It’s crucial to use a wire gauge that can handle the increased length to prevent any power loss or damage to the motor. Refer to a wire gauge chart to determine the appropriate gauge for the desired wire length. If necessary, upgrade to a thicker gauge wire to ensure optimal performance and safety.
Determining Wire Connectors
Lastly, consider the type of wire connectors you will need to properly extend the wires. Wire connectors provide a secure and reliable connection between the existing wires and the extension wires. There are various types of connectors available, such as butt connectors, crimp connectors, and solder connectors. Choose connectors that are suitable for your wire gauge and ensure a waterproof and durable connection.
| Factors to Consider | Steps to Follow |
|---|---|
| Determining Wire Length | Measure the distance from the trolling motor to the battery location, considering any routing or obstacles. Add a few extra inches for flexibility. |
| Evaluating Wire Gauge | Check the gauge of your existing wires and refer to a wire gauge chart to determine the appropriate gauge for the desired length. Upgrade to a thicker gauge if necessary. |
| Determining Wire Connectors | Select wire connectors that are suitable for your wire gauge. Choose connectors that provide a waterproof and secure connection. |
Gathering the Required Tools and Materials
Before you can begin extending the wires for your trolling motor, it’s essential to gather all the necessary tools and materials. Having the right equipment will ensure a smooth and efficient process. Here are the items you’ll need:
1. Wire Strippers
Wire strippers are essential for removing the insulation from the ends of the existing wires. This will allow you to connect the extension wires properly. Make sure to choose a wire stripper that is suitable for the gauge of wire you are working with.
2. Heat Shrink Tubing
Heat shrink tubing is used to cover the joint between the existing wires and the extension wires. When heated, it shrinks and creates a secure and waterproof seal. Select heat shrink tubing that fits the diameter of your wires and is long enough to cover the entire joint.
3. Soldering Iron
A soldering iron is necessary for creating a strong and reliable connection between the wires. It allows you to join the existing wires to the extension wires securely. Choose a soldering iron with a temperature control feature to ensure precise and efficient soldering.
4. Electrical Tape
Electrical tape is used to provide an additional layer of protection and insulation for the extended wires. It helps to secure the joint and prevent any accidental contact with other electrical components. Opt for high-quality electrical tape that is durable and resistant to wear and tear.
By gathering these tools and materials, you’ll be well-prepared to extend the wires for your trolling motor. Remember to choose high-quality products to ensure a safe and reliable connection.
Extending the Trolling Motor Wires
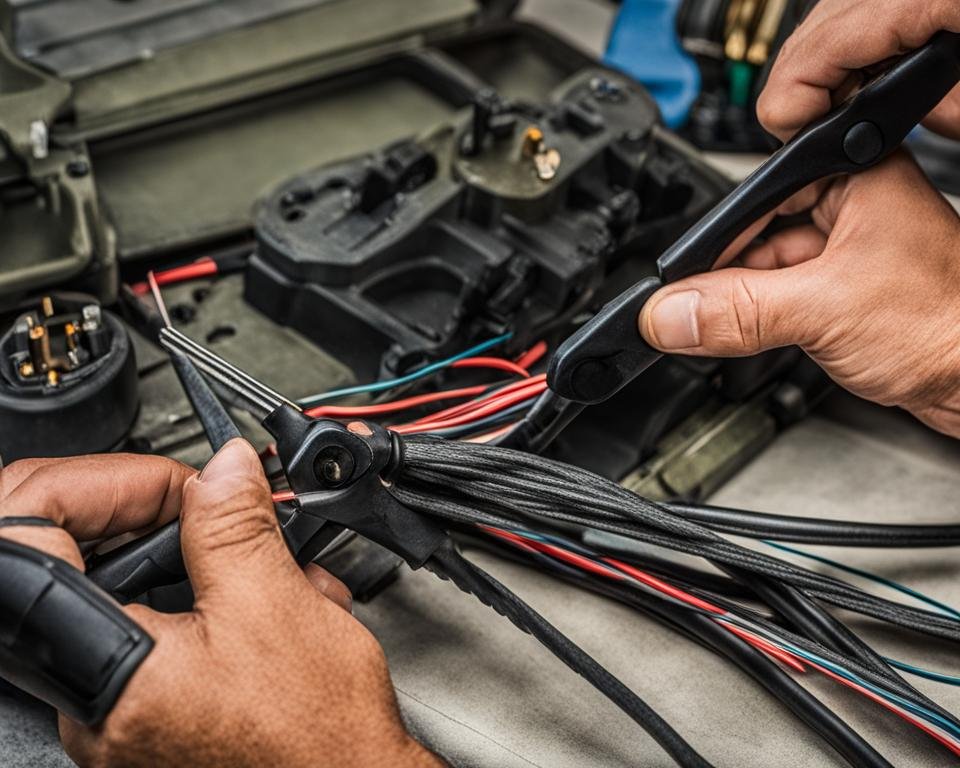
When extending the trolling motor wires, it’s important to follow a step-by-step process to ensure a secure connection. Here’s a guide on how to safely extend your trolling motor wires using strip the wire insulation, solder the wires, cover with heat shrink tubing, and secure with electrical tape.
Step 1: Strip the Wire Insulation
The first step in extending the trolling motor wires is to carefully strip the insulation from the ends of the existing wires. Use wire strippers to remove a small section of insulation, exposing the bare metal wire underneath. Take caution not to cut into the wire strands while stripping the insulation.
Step 2: Solder the Wires
Once the wire ends are exposed, you can proceed to solder the extension wires to the existing wires. Use a soldering iron to heat the joints and melt solder onto the connection, creating a secure bond. Be sure to hold the wires in place until the solder cools and hardens.
Step 3: Cover with Heat Shrink Tubing
To provide insulation and protection to the soldered connection, cover it with heat shrink tubing. Slide the tubing over the joint, ensuring it covers the entire exposed section of the wires. Apply heat using a heat gun or lighter to shrink the tubing, creating a tight seal around the connection.
Step 4: Secure with Electrical Tape
For added protection and to secure the extended wires, wrap the joint with electrical tape. Start by wrapping a few inches of tape tightly around the connection, making sure to overlap each layer for maximum coverage. Continue wrapping until the entire joint and a portion of the surrounding wire is covered.
By following these steps and using strip the wire insulation, solder the wires, cover with heat shrink tubing, and secure with electrical tape, you can successfully extend your trolling motor wires. Ensure that all connections are secure and properly insulated before using the trolling motor to prevent any electrical issues or malfunctions.
| Step | Description |
|---|---|
| Step 1 | Strip the wire insulation using wire strippers. |
| Step 2 | Solder the extension wires to the existing wires using a soldering iron. |
| Step 3 | Cover the joint with heat shrink tubing and use heat to shrink it around the wires. |
| Step 4 | Secure the connection with electrical tape by wrapping it tightly around the joint. |
Testing and Securing the Extended Wires
Once you have extended the trolling motor wires, it is crucial to test the connection to ensure it is working properly. Testing the connection will help identify any issues or faults that need to be addressed before you hit the water. Connect the motor to a power source and observe its performance. Pay attention to any unusual noises, vibrations, or power fluctuations that may indicate a problem with the extended wires.
If the connection passes the test and operates smoothly, it is time to secure the extended wires in place. One effective method is to use zip ties to neatly bundle and fasten the wires. This will prevent them from getting tangled or becoming a safety hazard while you are on the water. Make sure the zip ties are tight enough to hold the wires firmly in place but not too tight as to damage the insulation.
To provide additional protection against water damage, consider waterproofing the connection. Apply a marine-grade sealant or silicone to the joint and surrounding areas. This will create a barrier against moisture, preventing corrosion and ensuring the longevity of your extended trolling motor wires. Remember, it is essential to use a waterproofing method suitable for marine environments to maintain the integrity of the connection.
Table: Extended Trolling Motor Wires Testing and Securing
| Step | Description |
|---|---|
| 1 | Connect the trolling motor to a power source. |
| 2 | Observe the motor’s performance for any issues or faults. |
| 3 | Secure the extended wires using zip ties. |
| 4 | Apply a marine-grade sealant or silicone to waterproof the connection. |
Conclusion
Extending trolling motor wires can significantly improve the maneuverability and flexibility of your boat on the water. By following the steps outlined in this guide, you can safely and efficiently extend the wires to achieve your desired battery placement. It’s important to assess your wiring needs, gather the necessary tools, and make secure connections to ensure optimal performance.
Start by determining the length of wire required and evaluating the wire gauge to handle the extended length. Gather the essential tools, including wire strippers, heat shrink tubing, a soldering iron, and electrical tape, to properly extend the wires. Carefully strip the wire insulation, solder the wires together, cover the joint with heat shrink tubing, and secure it with electrical tape.
After extending the wires, test the connection to ensure it functions correctly. Connect the motor to a power source and check for any issues. Once you confirm the connection, secure the extended wires in place using zip ties. Consider waterproofing the connection with a marine-grade sealant or silicone for added protection.
By taking the time to extend your trolling motor wires properly, you can enjoy the benefits of a more versatile boating experience. Take caution and follow the steps in this guide to extend your trolling motor wires safely, allowing you to make the most of your time on the water.

- How to Inflate Intex Explorer K2 Kayak? - June 10, 2025
- Experience the Thrill of Tandem Kayaking with Necky Amaruk Tandem Kayaks - April 13, 2024
- How to Transport a Kayak on a Car? - February 29, 2024