 Are you an adventurous soul who loves kayaking? If you own an RV, you know the struggle of transporting your kayak safely while on the road. That’s where a sturdy and reliable kayak rack comes into play. In this article, we will guide you through the process of building your own kayak rack for your RV, giving you the freedom to explore new waters wherever your journey takes you.
Building a kayak rack for your RV allows you to securely transport your beloved kayak, ensuring it remains undamaged during the journey. With a few DIY skills and some basic materials, you can create a customized rack that meets your specific needs and preferences.
There are various options available for building a kayak rack, including using PVC piping, wood, or modified cargo racks. Each option has its own advantages and considerations, allowing you to choose the best fit for your RV and kayak.
Whether you’re looking for an affordable and versatile PVC rack, a durable and strong wooden rack, or a modified cargo rack solution, we’ve got you covered. In the upcoming sections, we’ll explore each type of rack in detail, providing step-by-step instructions and handy tips to ensure your DIY project is a success.
So, if you’re ready to take your kayaking adventures to the next level, let’s dive into the world of DIY kayak racks for RVs!
Building a DIY PVC Kayak Rack
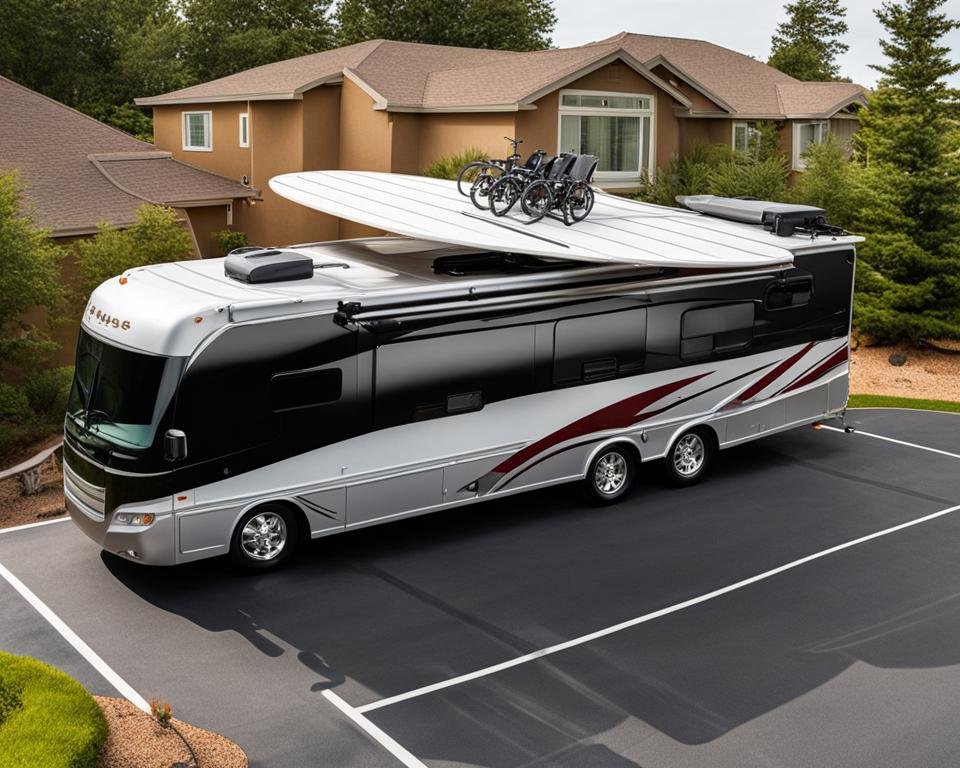
When it comes to building a kayak rack for your RV, consider using PVC piping. This versatile material is affordable, easy to work with, and customizable to your desired design. PVC racks can be mounted on the roof or vertically on the rear of your RV, depending on the available mounting options.
One of the advantages of using PVC piping for your kayak rack is the dry-fit assembly. This allows for adjustments and corrections during the construction process, ensuring a precise fit. PVC piping can also be painted or finished to increase its durability and aesthetic appeal, allowing you to match it to the style of your RV.
Step-by-Step Guide: Building a PVC Kayak Rack
- Measure the dimensions of your kayak to determine the appropriate size for the rack.
- Choose the type and size of PVC piping based on your measurements and desired design.
- Cut the PVC piping into the necessary lengths using a saw or PVC pipe cutter.
- Assemble the PVC pieces using PVC connectors and adhesive, ensuring a secure and stable structure.
- Attach the completed PVC rack to your RV using suitable mounting hardware.
By following these steps and utilizing PVC piping, you can create a DIY kayak rack for your RV that is both functional and budget-friendly. Enjoy the convenience of safely transporting your kayak on your next outdoor adventure.
Constructing a Wooden Kayak Rack
If you prefer a more traditional and sturdy option for your RV kayak rack, constructing a wooden kayak rack may be the perfect choice. While it may require more tools and knowledge compared to PVC piping, wood offers durability and strength that can withstand the rigors of travel. Here are some key considerations and steps to help you build your own wooden kayak rack:
Choosing the Right Wood
When selecting the wood for your kayak rack, it’s important to choose a species that is suitable for outdoor use and can withstand exposure to the elements. Cedar and redwood are popular choices due to their natural resistance to rot and decay. Additionally, these woods are lightweight and easy to work with, making them ideal for DIY projects.
Design and Measurements
Before starting the construction process, it’s important to determine the design and measurements of your wooden kayak rack. Consider the dimensions of your kayak and the available space on your RV. Ensure that the rack is wide and long enough to accommodate the kayak and provide a secure fit. It’s also essential to consider the height of the rack to ensure that it doesn’t interfere with any obstructions on your RV.
Construction Process
Once you have your design and measurements finalized, you can begin the construction process. Start by cutting the necessary pieces of wood according to your measurements. Use screws or nails to secure the pieces together, ensuring a sturdy and reliable structure. It’s essential to reinforce any joints or connections to provide additional strength and stability. Lastly, sand and finish the wood rack to protect it from the elements and enhance its aesthetic appeal.
| Materials | Approximate Cost |
|---|---|
| Cedar or Redwood | $50-$100 |
| Screws or Nails | $10-$20 |
| Sandpaper and Finish | $10-$20 |
| Tools (saw, drill, etc.) | Depends on existing tools |
Table: Approximate Cost of Materials for Building a Wooden Kayak Rack
Building a wooden kayak rack for your RV requires careful planning, attention to detail, and basic woodworking skills. However, the end result is a sturdy and reliable rack that can safely transport your kayak during your travels. With the right choice of wood, proper design and measurements, and a well-executed construction process, you can enjoy peace of mind knowing that your kayak is secure and ready for your next adventure.
Modifying Cargo Racks for Kayak Transportation
When it comes to transporting your kayak on your RV, modified cargo racks offer a convenient and efficient solution. These racks, typically designed for bikes and other equipment, can be easily adapted to securely hold your kayak in place during travel.
To modify a cargo rack for kayak transportation, start by cutting square holes in the mesh bottom of the rack. These holes will allow you to secure one end of the kayak, preventing it from sliding or shifting during transit. It’s important to use non-damaging materials, such as foam, to protect the kayak from contacting the metal edges of the rack.
In addition to securing the bottom portion of the kayak, you can also use a hitch-mounted truck bed extender to secure the upper portion. This setup provides a solid and easily accessible rack for your kayak, ensuring a safe and hassle-free journey.
| Benefits of Modified Cargo Racks for Kayak Transportation | Considerations |
|---|---|
|
|
By modifying a cargo rack for kayak transportation, you can maximize the space on your RV and safely transport your kayak without the need for additional racks or equipment. Take the necessary precautions and ensure proper installation to enjoy worry-free kayaking adventures on your RV trips.
Considerations and Cost of Building a Kayak Rack
When building a DIY kayak rack for your RV, there are several important considerations to keep in mind. These factors will ensure the safety and functionality of your rack, as well as enhance your overall kayaking experience.
Considerations
- Ground Clearance: Make sure the height of your kayak rack doesn’t interfere with the ground clearance of your RV. This will prevent any damage or obstacles while driving on uneven terrain.
- Weight Distribution: Properly distribute the weight of your kayak rack and kayak to maintain stability and balance while on the road. Uneven weight distribution can lead to swaying or loss of control.
- Access: Ensure easy access to your kayak by designing the rack in a way that allows you to load and unload it effortlessly. Consider the height of the rack, the placement of straps or tie-downs, and any additional equipment needed for securing the kayak.
Cost
The cost of building a DIY kayak rack for your RV can vary depending on the materials used and the complexity of the design. However, DIY racks are generally more affordable compared to purchasing pre-made racks.
On average, the estimated cost of building a DIY kayak rack ranges from $175 to $300. This cost includes the materials needed, such as PVC piping or wood, as well as any additional hardware or accessories required for installation.
| Materials | Estimated Cost |
|---|---|
| PVC Piping | $30 – $50 |
| Wood | $50 – $100 |
| Hardware & Accessories | $20 – $50 |
These cost estimates provide a general guideline and may vary depending on factors such as the size of your kayak, the number of kayaks you plan to transport, and any additional features you choose to incorporate into your rack design.
By taking these considerations into account and budgeting for the estimated costs, you can confidently proceed with building a DIY kayak rack for your RV. With proper planning and execution, you’ll have a reliable and custom-made rack that will safely transport your kayak on your RV adventures.
Conclusion
In conclusion, building a kayak rack for your RV is a practical and cost-effective solution for transporting your kayak while on the road. Whether you choose to use PVC piping, wood, or modified cargo racks, there are various options available to suit your specific needs and preferences.
When constructing your kayak rack, it is important to consider factors such as ground clearance, weight distribution, and ease of access. These considerations will ensure safe and secure transportation of your kayak, minimizing any risks or difficulties during travel.
By following the steps and tips outlined in this guide, you can confidently build a kayak rack that meets your requirements. Remember to take into account the materials, tools, and knowledge required for each option, as well as the estimated costs ranging from $175 to $300 for a DIY rack.
With your newly built kayak rack, you’ll be able to enjoy kayaking adventures wherever you go with your RV. So, start planning your next trip and take your kayak along for the ride!

- How to Inflate Intex Explorer K2 Kayak? - June 10, 2025
- Experience the Thrill of Tandem Kayaking with Necky Amaruk Tandem Kayaks - April 13, 2024
- How to Transport a Kayak on a Car? - February 29, 2024