Learning how to properly inflate an inflatable kayak is crucial for ensuring its longevity and performance. Inflating a kayak should be done in a dry, flat, and clear area, preferably near the launch site. By following the right steps, you can easily blow up your inflatable kayak and get ready for your exciting kayaking adventures.
Before you begin the inflation process, it’s important to gather all the necessary equipment, including a pump suitable for your kayak and any additional accessories you may have. This will ensure that you have everything you need to properly inflate your kayak and enjoy a smooth ride on the water.
The inflation process should start by partially inflating the three main air chambers, which include the floor chamber and the side walls. This will allow the kayak to take shape and settle properly. Once the chambers are partially inflated, check for any signs of warping or uneven inflation and make any necessary adjustments.
After ensuring that the chambers are partially inflated correctly, proceed to fully inflate them. Start with the floor chamber and then move on to the side walls. It’s important to inflate each chamber evenly and avoid overinflation, as this can affect the kayak’s stability and performance.
Keep in mind that the inflation time should not exceed 10 minutes once you become familiar with the process. If the inflation takes longer, it may indicate a potential issue with the kayak or the pump. In that case, it’s recommended to seek assistance or consult the kayak manufacturer for guidance.
Lastly, it’s important to be mindful of the impact of temperature on the inflation level. Different temperatures can affect the air pressure in the chambers, so be sure to adjust the pressure accordingly to ensure the kayak is properly inflated. Carrying a repair kit and a safety kit on board is also recommended to be prepared for any unexpected issues that may arise during your kayaking adventure.
By following these proper inflation techniques, you can maximize the performance and lifespan of your inflatable kayak and enjoy many memorable experiences on the water.
Step-by-Step Guide to Inflating an Inflatable Kayak
Properly inflating an inflatable kayak is essential for ensuring its performance and longevity. Follow this step-by-step guide to achieve optimal inflation:
- Unfold the kayak: Start by unfolding the kayak and laying it out on a flat surface. Ensure that there are no sharp objects that may puncture the kayak.
- Inflate the floor chamber: Begin by inflating the floor chamber to about 60% capacity. This will provide a stable base for the kayak and allow room for the other air chambers to settle.
- Inflate the wall chambers: Next, partially inflate each side or wall chamber. Take care to ensure that the chambers are evenly inflated and there are no indications of warping.
- Fully inflate the kayak: Once all chambers are partially inflated and properly aligned, proceed to fully inflate the kayak. Start with the flooring chamber and then inflate the side walls.
Remember to check the kayak’s instruction manual for any specific inflation guidelines or recommendations.
Table: Recommended Inflation Steps for Inflatable Kayak
| Step | Description |
|---|---|
| 1 | Unfold the kayak on a flat surface |
| 2 | Inflate the floor chamber to 60% capacity |
| 3 | Partially inflate each side or wall chamber |
| 4 | Fully inflate the floor and side chambers |
Choosing the Right Pump for Inflating an Inflatable Kayak
When it comes to inflating an inflatable kayak, choosing the right pump can make the process much easier and more efficient. There are three common types of air pumps that are commonly used: hand pumps, foot pumps, and electric pumps.
Hand Pumps
Hand pumps are manually operated and come in various sizes and styles. They are portable and easy to use, making them a popular choice among kayak enthusiasts. Hand pumps allow for precise control of the inflation process, and they are suitable for both partial and full inflation of the kayak. While hand pumps may require some physical effort, they offer a reliable and cost-effective option for inflating your kayak.
Foot Pumps
Foot pumps are another popular choice for inflating inflatable kayaks. These pumps are operated by applying pressure with your foot, which makes them less strenuous to use compared to hand pumps. Foot pumps are often designed with an integrated pressure gauge, allowing for accurate inflation. They are efficient and easy to use, making them a great option for those who prefer a hands-free inflation experience.
Electric Pumps
If speed is a priority, electric pumps are the way to go. These pumps are powered by an electric motor, providing fast and effortless inflation. Electric pumps come in different models, some of which can be connected to a car battery or powered by batteries. These pumps offer the fastest inflation times, with some capable of inflating kayaks in as little as 2 minutes. However, they may require a power source, making them less portable than hand pumps or foot pumps.
When choosing a pump, consider your personal preferences and the desired inflation speed. Hand pumps and foot pumps provide a more hands-on experience, while electric pumps offer convenience and speed. Whichever pump you choose, ensure it is compatible with your kayak’s valve system and meets your inflation needs.
| Pump Type | Inflation Time |
|---|---|
| Hand Pump | Approximately 5-8 minutes |
| Foot Pump | Approximately 5-8 minutes |
| Electric Pump | Approximately 2 minutes |
Recommended Air Pressure for Inflating an Inflatable Kayak
When inflating an inflatable kayak, it is important to ensure that you use the right air pressure to maximize performance and durability. The required air pressure, measured in pounds per square inch (PSI), can vary depending on the construction and design of the kayak. Different chambers of the kayak may also have different recommended inflation levels. Here are some general guidelines to follow:
Floor Chamber
The floor chamber of an inflatable kayak provides stability and rigidity. To achieve the optimal performance, it is essential to inflate the floor chamber to the recommended PSI. For basic PVC constructed kayaks, the recommended PSI is typically between 2.5 and 4. For more advanced constructions like drop stitch kayaks, the recommended PSI may range from 6 to 14. It is important to refer to the instruction manual of your specific kayak model to determine the exact recommended PSI for the floor chamber.
Side Chambers
The side chambers of an inflatable kayak provide buoyancy and shape. The recommended air pressure for the side chambers may differ from the floor chamber. In some cases, kayaks with drop stitch construction on the flooring may require higher PSI for the floor chamber and lower PSI for the side chambers. It is crucial to check the instruction manual for your kayak model to find the recommended inflation levels for the side chambers.
By inflating the floor chamber and side chambers to the appropriate air pressure, you can ensure that your inflatable kayak performs optimally on the water. Proper inflation not only enhances stability and maneuverability but also helps prevent damage to the kayak’s construction. Remember to always consult the manufacturer’s instructions for the recommended PSI for your specific kayak model.
| Construction | Floor Chamber PSI | Side Chamber PSI |
|---|---|---|
| Basic PVC | 2.5 – 4 | Varies* |
| Drop Stitch | 6 – 14 | Varies* |
*Refer to the instruction manual for specific recommended PSI levels for side chambers.
Best Practices for Inflating an Inflatable Kayak
When it comes to inflating an inflatable kayak, following best practices ensures a smooth and successful experience. Here are some guidelines to help you inflate your kayak properly:
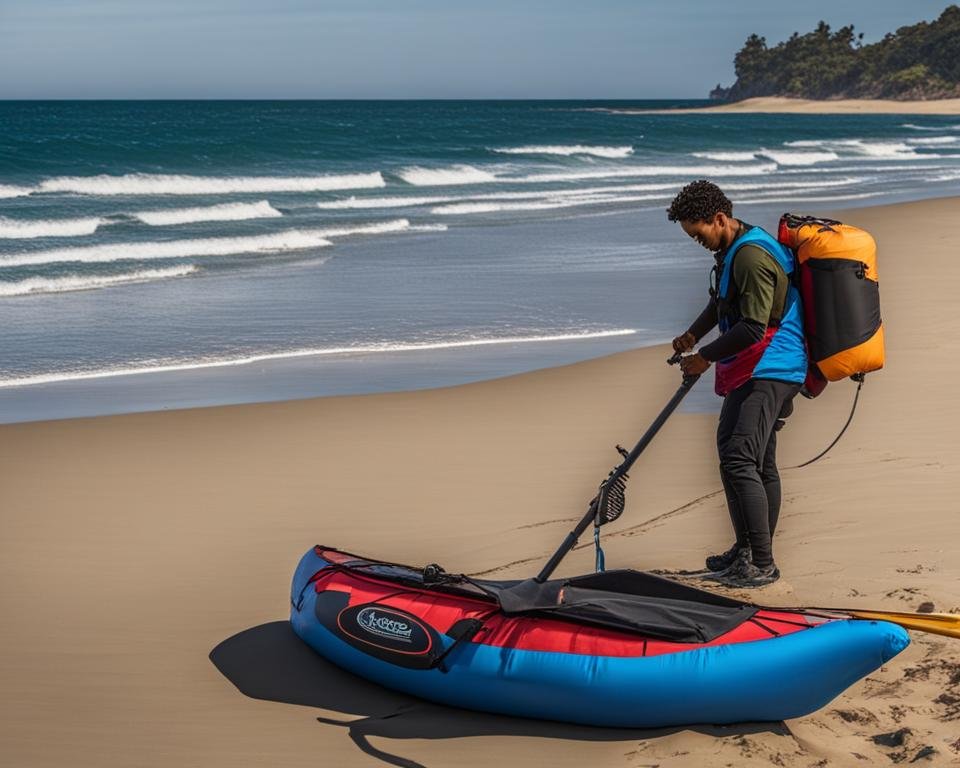
- Choose a flat surface: Select a flat and clean surface to set up your kayak. This could be a grassy field near the launch site, a sandy beach, or a flat boat launch area. A flat surface provides stability during inflation and ensures the kayak is evenly inflated.
- Select the right inflation location: It is essential to choose a dry area for inflating your kayak. Avoid areas with sharp rocks or sticks that could puncture the kayak’s material. Additionally, try to set up your kayak near the launch site to minimize carrying it when fully inflated.
- Use proper pump attachments: Different kayak models may require specific pump attachments to fit their valves. Make sure to use the attachments provided with your kayak or purchase compatible ones. Proper attachments ensure a secure connection and efficient inflation.
- Store your kayak properly: After inflating your kayak, it is crucial to store it correctly to maintain its condition. Keep your kayak out of direct sunlight, as prolonged exposure can damage its material. Additionally, periodically check the air pressure to ensure it remains at the recommended level.
By following these best practices, you can ensure a successful inflation process and enjoy your inflatable kayak adventures to the fullest. Choosing a flat surface, selecting the right inflation location, using proper pump attachments, and storing your kayak correctly are all key factors in maintaining the longevity and performance of your inflatable kayak.
Now that you have learned the best practices for inflating an inflatable kayak, the next section will cover the process of deflating and folding the kayak for convenient storage.
Deflating and Folding an Inflatable Kayak
To ensure the proper storage and transportation of your inflatable kayak, it is important to know how to deflate and fold it correctly. By following these steps, you can break down your kayak efficiently and ensure it is ready for future use.
1. Remove Accessories
Before deflating your kayak, remove any accessories such as thigh straps and foot pegs. Loosen the straps supporting the seat and unclip them from the D-rings. Fold the seat for storage, making sure it is secure and won’t get damaged during transportation.
2. Deflate and Fold
To begin deflating your kayak, open the valves and release the air. Starting from the bow, fold the kayak towards the stern. Take caution to fold the side tubes properly, ensuring there are no trapped air pockets. Carefully press out any remaining air and fold the kayak as compactly as possible.
While folding, you may find it helpful to fold the kayak in half first, then fold the sides in towards the center. This method can help reduce the overall size of the folded kayak, making it easier to fit into the provided carry bag or backpack.
3. Secure for Storage
Once the kayak is folded, secure it in the provided carry bag or backpack. Make sure all zippers and closures are properly fastened to prevent any damage during storage or transportation. It is also recommended to store the kayak in a cool, dry place, away from direct sunlight and extreme temperatures.
By following these steps, you can easily break down and store your inflatable kayak, ensuring its longevity and convenience for future adventures.
Conclusion
Understanding the proper setup and inflation techniques for an inflatable kayak is crucial in order to maximize your kayaking experience. By following the step-by-step guide and using the recommended pumps, you can ensure that your kayak is properly inflated and ready for adventure. Remember to choose a suitable location for inflation, such as a flat and dry surface near your launch site, to prevent any unnecessary damage to your kayak.
Proper storage is also key to maintaining the longevity of your inflatable kayak. Storing the kayak out of direct sunlight and periodically checking the air pressure will help prevent any potential damage or leaks. Always remember to remove any accessories, deflate the kayak correctly, and fold it properly for storage. By following these storage tips, you can keep your kayak in great condition for future use.
So, whether you’re a beginner or an experienced kayaker, utilizing proper inflatable kayak setup techniques and storage practices will ensure that you have a safe and enjoyable time on the water. Take the time to learn the inflation process and maintain the recommended air pressure for optimal performance. With these tips in mind, you can confidently embark on your inflatable kayak adventures and make the most out of every paddling excursion.

- How to Inflate Intex Explorer K2 Kayak? - June 10, 2025
- Experience the Thrill of Tandem Kayaking with Necky Amaruk Tandem Kayaks - April 13, 2024
- How to Transport a Kayak on a Car? - February 29, 2024